Rustic Hall Stand

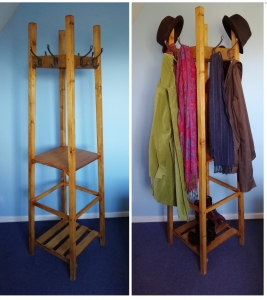
Many of my projects are led by customer requirements, this was definitely the case with the hall stand I have built this week.  My client has a large family and needed a storage solution for coat and scarfs but could not use the traditional method of fitting coat hooks and a shelf on the wall in the hallway.  They had previous bought a free standing hat/coat stand from a leading furniture outlet but it has proved to be to flimsy and unstable.  

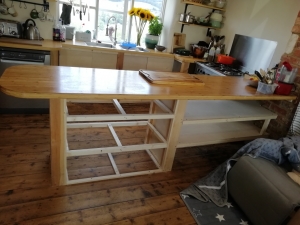
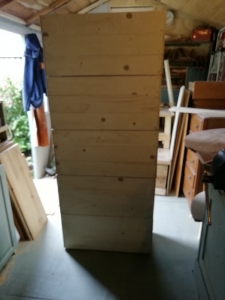
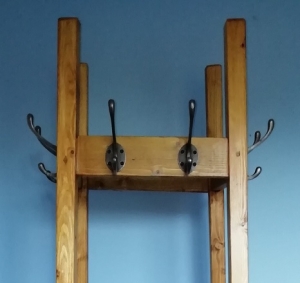
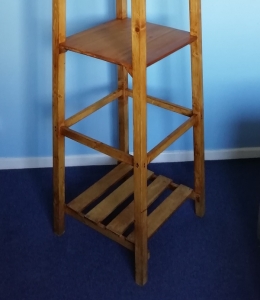
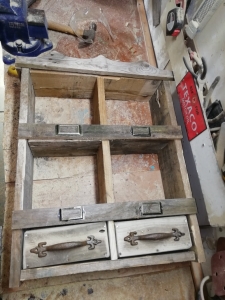
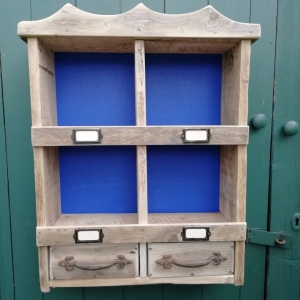
The stand is designed with a larger base than its top so that it is much stronger and more stable.  The eight hooks will allow plenty of hanging space and the extension of the frame allows for storage of hats and scarfs. The middle and the lower shelf will also facilitate the storage or shoes, umbrellas etc.

Whilst this one has been made especially for a client if you would like to take a stand just like this or something similar please let me know via an email or message

Reclaimed Wood Pigeon Holes With Built-in Drawers


The customer is always right… Just lately I have been on a roll when it comes to selling pigeon holes on my market stall.  They are being snapped up as quick as I can make them.  This is great news for me as I love making them. 

I am always on the lookout for suitable donor pallets. As luck would have it there was a perfect pallet outside the stove shop in Stroud earlier this week and they were happy to let me take it.  It was well aged and had nice wide planks that were not too hard to strip.  A lot of sawing and sanding later and I had the layout sorted. I decided to add a couple of drawers to this one and as I picked up a set of antique handles from the Giant Flea in Malvern at the weekend I though they would be the perfect for this project

This set has been designed to be mounted on the wall or they can sit on top of surface if you wish.  I will be taking these to the Stroud farmers market this Saturday 31st August so if you are interested pop down early as I am sure they will go quickly


From Shed to Garden Crate

Earlier this week I was tasked with removing an old garden shed and replacing it with another from a friends property. 

The relocating of the replacement shed was a little bit of fun but with the help of a couple of strong friends it was soon loaded onto my truck and transported down the M5 to its new home, all in one piece.  Before it could be erected in its new home the old one needed to be demolished.  Whilst two side where rotten the door, roof and other two sides were in reasonable condition. 

I loaded them onto the truck and brought them home to see what I could salvage.  I am happy to report that there was a good amount of usable wood, the good sides and the roof will be used for a log store next time someone orders one. The rest of the wood was stripped of nails and the rotten pieces where trimmed. I knew right away what I would make from them…. Garden Crates. 

I cut 9 equal lengths for the bottom and sides of each crate and 4 pieces for the two ends. I was also able to use the main support struts for the corners, bottom and runners. After cutting the hand holes in 8 of the end panels I constructed each crate using the nails I had previously removed. So every single piece of each crate came from the old shed.

My cat Henry loves boxes so as soon as I put them out on the lawn he jumped in and checked them out.  A short while later I came back to move them and found him fast asleep in one of them.

These will be on my market stall next Saturday at the Cheltenham Craft market on the Prom. If you would like one or more and can’t make it to one of my markets please let me know and I can organise collection or delivery

Dinner for Six

One of my good friends recently asked me if I could replace her current garden table with something a little bigger. As she only has limited space, it needed to be compact, fit in with the look of her garden and not cost too much.

As I love working with reclaimed wood I decided that this project should be made from a hardwood pallet for the table top and I already had some pieces of 2 by 4 that I had salvaged earlier along with a couple of shorter pieces left over from another job.

Taking the pallet apart without loosing any of the seven top slats is a skill in itself but over the years I have discovered which pallets come apart the easiest and so I knew that I had to find a two way hardwood pallet without hook nails and in good condition.  After removing the nails and sanding down all the slats I was ready to go.  I built the base using glue and dowels on the end sections and combined them with lap joints and pocket screws on the sides. I then found the centreline and fixed the six slats using galvanised countersunk screws. To tidy up the ends of the table top, I used a ripped down slat on each end to add strength.   All the screw holes were then filled and the whole table was sanded again.

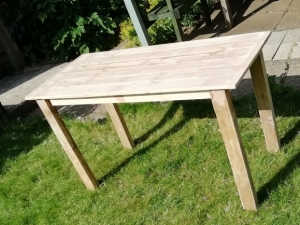
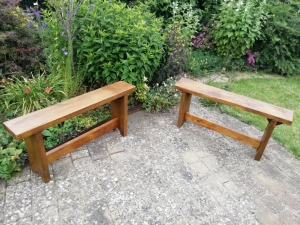
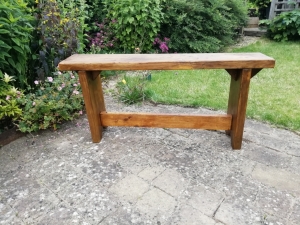
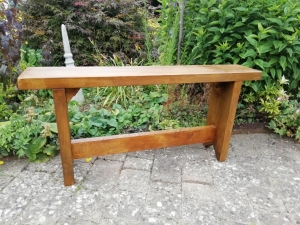
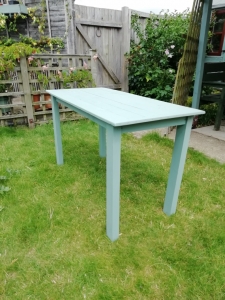
Even though I like the natural wood look my friend wanted it painted to protect it against the weather and to go with her existing garden furniture so I gave it a coat of sage exterior paint.  I delivered later the same day and she was very happy. It will be tested next weekend with a dinner for six (Me included so I will update the story with a picture)
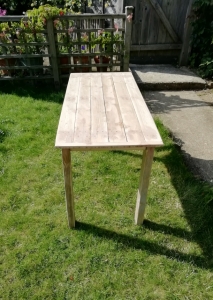
As tables are quite large I generally don’t bring them along to any of my craft markets, so if you are after a table, big or small, please send me a message, email or text and I will be happy to make one to suit your requirements.

Email  martin@goodwithwoodstroud.co.uk

Mobile 0777551624


Simple Storage Solutions


This week I have dedicated a day to utilise all the plywood offcuts I have from the last couple of big jobs. It will make a lot more room in my workshop and it will also give my a change to increase my market offerings with a selection of open top storage/display boxes.

After sorting through the offcuts I discovered that I had 9mm wisa spruce ply and both 9mm and 12mm birch ply, this helped with the design decisions as the 12mm will make great bases. The rest came down to the size and shape of thee pieces.  Once completed the insides were painted with vibrant colours and coated in a clear varnish whilst the outsides were varnished with a vintage oak stain.

So watch out for these boxes at the next couple of markets or drop me an email or message if you would like one (or more)


Custom Kitchen Makeover

There are many great things about living in Stroud, along with the beautiful countryside, wonderful valleys and hills and the award wining weekly farmers market there is also the wide variety of wonderful old Cotswold stone houses. 

These properties are often very quirky with unusual layouts and uneven floors and walls.  This brings many challenges and for me opportunities to come up with unique and custom solutions.  This weeks project has been very interesting, the client needed a set of cupboards built to hide the area under the sink and several sets of shelves to be fitted under their existing kitchen benches.  The final challenge and probably the most interesting was to build a set of drawers to fit under the counter that could be opened from both sides.  The floor and wall levels added to the complications but with the selection of custom sliding doors under the sink I was able to hide the fact that the gap from the bench to the floor differed by as much as 3cms from one end to the other and the existing legs on the benches were not quite square. the drawers, doors and shelves plus the boxing in were constructed using 9mm and 12mm birch plywood which were all stained to match in with the kitchen.

The advantage of having hand made storage solutions is that you can have all the furniture and fittings that you need at a reasonable price and it will fit into whatever shape your property happens to be.

Please let me know if you would like to arrange a visit to discuss your requirements

In an English country garden

Sometimes a project just happens…

On the way back from a job yesterday, I noticed a couple of old scaffold boards dumped outside a garden in Horsley. After asking the owner if I could have them, I loaded them up into the Morris Traveller (it was a bit of a squeeze).  As soon as I saw them I knew that I would be making a pair of garden benches.  I was able to make almost all of each bench from the boards, I only needed to use a couple of side pieces from a old pallet that I had in the wood shed as stabilising beams.

After a quick sanding to remove the cement residue and a couple of coats of exterior wood stain they were all set for a trip to the Tewkesbury High Street Arts and Crafts markets this weekend. So if you are looking for a pair of benches to enhance your garden pop down between 10am and 4pm on Sunday 21st but be quick I don’t think I will have them for long

Cool Colourful Caddies

Whenever I work on site I always take my tools in a couple of hand made tool caddies, mine are very long but they have a section for screwdrivers, pencils and scissors etc and they also have lift out trays for smaller tools and for easy access to the sections below.  As these have proved very useful and as I often receive compliments on the design and painted inserts I decided that it was time to make some small caddies that could be used for either tools or crafts. This is the result, three brightly colour samples ready for the Frome markets on Sunday. 

The good news is that I sold two of them at the markets so I will definitely be adding these to my range of caddies, look out for them at one of my upcoming markets


custom stackable storage crates

I like to think that over the last couple of years I have managed to help a lot of my customers with unique and bespoke storage solutions.

Just last week I was asked to quote on some storage crates for a young boys bedroom.  After discussing the requirements and budget, I was commissioned to build five large (70cm x 35cm x 30cm) stackable storage crates.  To keep the costs down without affecting their overall style I selected Wisa Spruce 9mm plywood. The buyer will be applying a coat of clear satin varnish later. The crates needed to be stackable so along with ensuring that they were all exactly the same size I added vertical and horizontal support struts with a slight offset so that the boxes slotted into each other. For easy movement I cut hand holds out on each end.  The crates where then loaded onto the trusty work truck and delivered to a very happy customer.

If you are looking for some custom made crates or any to other storage solutions please give me a call  or send me a message or email and I will be happy to help

Stained Glass Bathroom Wall Cabinet

Recently whilst at the Giant Flea market at Malvern I found this wonderful old piece of stained glass and knew straight away that it would become a door for a bathroom cabinet. 

Using ripped down reclaimed pitch pine floor boards I made a frame and using old hinges and a nice metal knob the door was born.  This set the dimensions for the rest of the cabinet, I made the body of the cabinet from pallet wood and backed it with some old plywood from an unwanted wardrobe. The towel rail is a aged willow branch.  The whole cabinet is brought together with a coat of light oak varnish which will make it idea for a bathroom setting

It think that this design will fit in perfectly in a Cotswold cottage and so I will definitely keep my eye out for more stained glass pieces

Update: This cabinet has now been sold, but I will be making more in the near future